

Road marking application is an essential part of road construction and maintenance. Proper installation helps create clear lane lines, pedestrian crossings, directional arrows, and traffic symbols. The quality of the finished markings depends on material selection, pavement preparation, application conditions, and quality control throughout the process.
Road marking application is an essential part of road construction and maintenance. Proper installation helps create clear lane lines, pedestrian crossings, directional arrows, and traffic symbols. The quality of the finished markings depends on material selection, pavement preparation, application conditions, and quality control throughout the process.
1. Inspect the Pavement
Before application, inspect the road surface to determine whether it is suitable for marking. Check for cracks, potholes, loose aggregate, oil contamination, and other defects. Asphalt and concrete may require different preparation methods depending on their surface characteristics and condition.
2. Clean and Prepare the Surface
Remove dust, dirt, loose particles, grease, and debris using appropriate sweeping or cleaning equipment. The pavement must meet the selected material’s requirements for cleanliness and moisture. New asphalt may also require sufficient curing time before marking, depending on the project specifications.
3. Set Out the Marking Layout
Measure and mark the required positions, widths, lengths, and spacing according to the approved traffic plan. Temporary chalk lines, string lines, or specialized marking equipment can help maintain accurate alignment. Traffic control measures should be established before work begins.
4. Select and Prepare the Marking Material
Common road marking materials include thermoplastic, water-based paint, solvent-based paint, and cold-applied reactive systems. Each material has different preparation and application requirements.
Water-based paint should be mixed as directed by the manufacturer. Thermoplastic material must be heated to the specified application temperature. Multi-component materials require accurate proportioning and mixing before their working time expires.
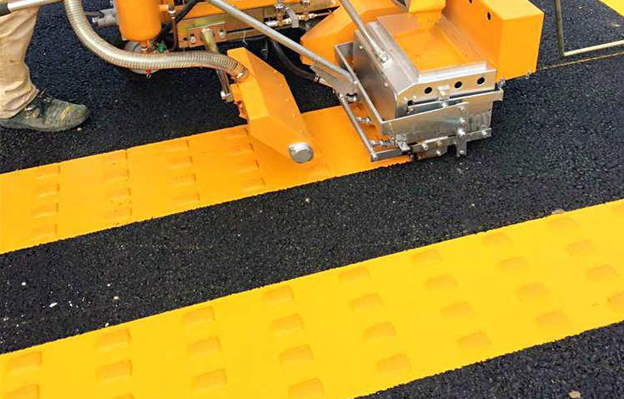
5. Apply the Road Markings
Apply the material using suitable equipment, such as spray machines, screed applicators, or extrusion systems. Maintain the specified line width, film thickness, application rate, and uniformity. Equipment settings should be adjusted according to the material and pavement conditions.
6. Apply Glass Beads When Required
For reflective markings, glass beads may be incorporated into the material or applied to the surface during installation. Drop-on beads must be applied at the specified rate and embedded to an appropriate depth to achieve effective retroreflectivity and retention.
7. Allow Sufficient Drying or Curing Time
Water-based paint needs time for water evaporation and film formation. Thermoplastic markings set as the material cools, while reactive materials cure according to their chemical formulation. Keep traffic off the markings until the material has reached the required condition for reopening.
8. Inspect and Test the Finished Markings
Check line alignment, width, thickness, color, surface defects, and adhesion. Where required, test retroreflectivity, skid resistance, and other performance properties according to the applicable standards. Repair defects before the markings are accepted for service.
Conclusion
A reliable road marking application process combines proper pavement preparation, accurate layout, suitable material selection, controlled installation, and thorough inspection. Following product instructions and local road authority specifications helps improve marking visibility, durability, and overall traffic safety.
This guide is an introduction. Use the selected product’s technical and safety instructions and the applicable project specification for installation.
Back to Resources